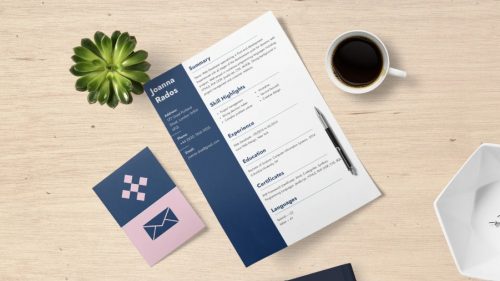
In today’s competitive job market, crafting a standout CV is essential. The good news? You don’t need to start from scratch. By leveraging a professional CV, you can streamline the process and ensure your application captures attention. Follow this step-by-step guide to create a CV that truly shines.
Why a Strong CV Matters?
Your CV is often your first impression with potential employers. It’s your personal marketing tool, showcasing your skills, experience, and accomplishments.
Recruiters typically spend less than 10 seconds scanning a CV, which means clarity and structure are key. A well-organized CV not only highlights your qualifications but also demonstrates your professionalism and attention to detail.
Step 1: Choose the Right Template

Before you dive into the details, selecting the right CV template is crucial. The ideal template should align with your industry and the role you’re applying for. For example:
- Traditional Roles: Opt for a clean, straightforward design with sections like education, experience, and skills clearly defined.
- Creative Roles: Choose a visually appealing template with unique fonts, colors, and layout elements to showcase your creativity.
- Technical Roles: Prioritize a format that emphasizes technical skills and certifications.
Pro tip: Make sure the template is ATS (Applicant Tracking System) friendly. Many companies use software to scan CVs, so avoid overly complex designs that might confuse these systems.
Step 2: Gather Your Information
Preparation is key to crafting a winning CV. Before you start editing your template, gather all relevant information:
- Contact Information: Full name, phone number, email address, LinkedIn profile, and portfolio (if applicable).
- Professional Experience: List your previous roles, including job titles, company names, dates, and key responsibilities.
- Education: Include your degrees, certifications, and notable achievements.
- Skills: Highlight hard and soft skills relevant to the role.
- Achievements: Quantify accomplishments where possible (e.g., “Increased sales by 25% in six months”).
Organizing this information beforehand will make populating your template much easier.
Step 3: Tailor Your CV to the Job
Generic CVs rarely impress recruiters. Tailoring your CV to each job application is essential. Start by reviewing the job description and identifying keywords or phrases that align with your skills and experience. For instance:
- If the job emphasizes project management, highlight your experience in leading projects.
- If the role requires technical expertise, ensure relevant skills are prominently featured.
Use the template to strategically position these keywords within sections like skills, experience, and summary.
Step 4: Craft a Compelling Personal Statement
Most CV templates include a space for a personal statement or professional summary. This section should be a brief snapshot of who you are and what you bring to the table. Keep it concise (2-3 sentences) and focus on:
- Your professional identity (e.g., “A results-driven marketing specialist…”).
- Your top skills or accomplishments.
- What you’re seeking in your next role.
Example:
“Dynamic software engineer with 5+ years of experience developing scalable web applications. Proven track record of improving system performance and streamlining workflows. Eager to bring innovative solutions to your team.”
Step 5: Highlight Your Experience

The experience section is often the centerpiece of your CV. Use bullet points to make this section easy to skim. Start each bullet with action verbs like “led,” “designed,” “increased,” or “developed” to convey impact. Quantify results wherever possible to demonstrate your value:
- Managed a team of 10 sales representatives, achieving a 30% increase in annual revenue.
- Designed and implemented a new customer onboarding process, reducing churn by 15%.
- Developed a social media strategy that grew followers by 40% in six months.
If you’re early in your career, you can also include internships, volunteer work, or freelance projects.
Step 6: Showcase Your Skills
Skills are often divided into two categories:
- Hard Skills: Technical abilities like proficiency in specific software, languages, or tools.
- Soft Skills: Interpersonal abilities like communication, leadership, or problem-solving.
Organize this section into a bulleted list or columns for easy readability. Prioritize skills that align with the job requirements.
Step 7: Polish Your Education Section
For recent graduates, the education section might take precedence over experience. Include:
- Degree(s) earned, institution name, and graduation year.
- Academic honors or awards.
- Relevant coursework or projects, especially if they align with the role.
For experienced professionals, this section can be more concise, focusing on your highest degree and certifications.
Step 8: Add Optional Sections (If Relevant)
Depending on your background, consider adding these optional sections:
- Certifications: Highlight industry-specific certifications.
- Languages: Indicate your proficiency levels (e.g., “Fluent in Spanish”).
- Volunteer Work: Showcase any volunteer roles, especially those that demonstrate leadership or technical skills.
- Hobbies and Interests: Include only if they’re relevant to the role or industry.
Step 9: Review and Refine

Once your CV is filled out, take the time to review it thoroughly. Check for:
- Spelling and Grammar Errors: Use tools like Grammarly to catch mistakes.
- Consistency: Ensure formatting, fonts, and spacing are uniform throughout.
- Clarity: Remove unnecessary jargon or fluff.
Consider asking a trusted friend or mentor to review your CV and provide feedback.
Step 10: Save and Export
Finally, save your CV in multiple formats. A PDF is ideal for most applications, as it preserves the formatting. However, keep a Word version on hand in case an employer requests it.


